Showing posts with label DIY. Show all posts

December 26, 2016

Cheddar Mashed Potato Latkes - Recipe

This was my first time making latke's and it wasn't half bad, but I definitely had to wing it with this recipe as I used the ingredients I already had on hand. If I made any changes to this in the future I'd add in some pre-cooked hashbrowns so that they aren't too mash potato-like in the inside.
2 Cups - Mashed Potatoes
2 Large - Eggs 
1/2 Cup - Sharp Cheddar Cheese, shredded
1 Tbsp - Bisquick
1/2 Tbsp - Vegetable Oil
1/2 Tsp - Chives, diced (dried or fresh)
2 - 3 Pinches - Garlic Powder
1- 2 Pinches - Salt
Sour Cream *Optional*

Whisk the eggs in a bowl with the Bisquick until blended. Combine all ingredients except for the vegetable oil and sour cream into the bowl and stir until evenly mixed. Heat skillet on medium heat using some of the oil with each new latke made. Add about 1/2 cup of latke mixture to the heated pan and spread it out to be about 1/2 inch thick. Cook latke 4-5 minutes on each side or until browned and be sure to flatten out the latke a bit with a spatula after the first flip. Plate the latke's and serve with a dollop of sour cream on top.

Makes around 6 latke's.

November 19, 2016

Pumpkin Pie Spice - Recipe

Tis the season for Pumpkin Pie Spice everything! You can use this for all your holiday desserts, drinks, or if you're like me you're adding it into your pancake mix as well. So here's my simple recipe on how you can make your own pumpkin pie spice. I used spices by McCormick (I recommend their organic line if it's available in the spice you want), and where it reads "part/s" you can use whatever measuring size you want (I went with tablespoons for mine). I also found that some other pumpkin pie spices may have additional things added to their spice such as ground clove, mace, sweet orange peel, brown sugar, or even cardamom.

Ingredients

2 Parts - Cinnamon, ground (I love ground Saigon Cinnamon for this)
1 Part - Ginger, ground (I used ground Chinese Ginger)
1 Part - Nutmeg, ground
1 Part - Allspice, ground

Combine ingredients into a spice jar (or similar). Close jar with a lid and shake vigorously until well combined.

 Now you're ready to sprinkle your Pumpkin Pie Spice on whatever food your heart desires!

November 06, 2016

Deer Costume - DIY

This Halloween I decided to be a deer so, I wanted to share my tutorial for the headband, ears, and tail. All the items I have here I got from Michaels, Hobby Lobby, and Target (or maybe you can find all this in one store). Overall, I thought this turned out really cute (although I didn't have time to do a deer makeup look) and a lot of people commented how I looked like a SnapChat filter which I thought was really cool too.

Deer Ears
Pattern (left) and Completed Deer Ear (right)

What you'll need...

Brown Felt
White Fur
Thread, brown
Sewing Needle
Scissors
Pen/Marker

You can make your ears whatever size you desire (I think my ears were around 4-5 inches in length), you can see the pattern shape I created in the above image (you may want to sketch out a pattern on paper before you cut your felt pattern out). Once you cut out your two felt ear shapes, you're going to reverse the direction on one of them in order to create a left and right ear.

Next you're going to cut out a rectangle of fur (mine was almost an inch in width and around an inch and half in length), be sure your fur is going in the right direction before you cut it out and to move your fur inward before cutting.

Next you're going to close the felt over on top the fur (see the above images to help figure out how to align them). Now you're just going to do a few simple straight stitches starting at the outer center ear fold and stitching down to the base, and then stitch the base of the ear shut. Knot off your stitch and trim off the excess thread and any white fur reaching out past the base. Repeat these steps for the other ear.

Blow your fur into an outward direction and trim off any white fur reaching out past your brown felted ears. Now that your ears are complete you can attach them at the base with hot glue onto your headband (tutorial below).

Deer Headband
Completed Deer Headband
What you'll need...

Headband
Hot Glue and Glue Gun
Fake Floral bouquet/s (of your choosing)
Antlers/Twiggs
Deer Ears (see previous tutorial)
Wire Cutters

First off you'll want a tight fitting headband in order to support the weight of this design. Next you're going to want to pull off some flowers from your bouquet and snip off some ends of some others things (your choice how you do this). If you use these fake glittery twiggs I found at Michaels you'll need some heavy duty wire cutters to cut these down to the length you want (yes, these got glitter everywhere). Also, if you want fake antlers I'd check Walmart around this time of year in their Christmas section as that was the only place I saw any (I probably would've got those if I found them sooner).

Heat up your glue gun and start arranging your items onto your headband. I would recommend spacing your ears further apart then I did as I felt mine were too close for an adult person (it may be cuter for kids to have them closer together). Keep in mind once your headband is opened onto your head it makes everything go more inward so, you may have to play around with this in order to get your arrangment looking the way you want once on.

If you find your headband is a bit loose once on you may be able to use some hair clips or pins to help it stay in place on your head although, wearing this could be difficult if you plan to drive.

Downward Deer Tail
Completed Tail
What you'll need...

Brown Fur
White Fur
Cotton Stuffing (or similar)
Thread, brown (or white)
Sewing Needle
Brown Felt
Safety Pin
Scissors
Pen/Marker
Pattern and Supplies
In order to do this you will also need some basic needle/thread stitching skills, nothing fancy required but you can use a sewing machine if you choose (I didn't).

I started by making a diamond shaped pattern using a pen on the underside of the white and brown fur, the size is around the length and width of my hand (which for me is around 7 L x 4 W inches), avoid using a marker on the white fur (stick to using a pen). Brush your fur inward before you start cutting, and keep in mind the direction your fur runs before you cut it as you want it to look natural (see image above). You'll want to cut off about an inch from the base of your diamond. Once you have them cut out to equal sizes you'll want to cut off an extra 1/2 inch around the brown fur, just don't cut off more from the base.

Next you're going to cut out a 2x1 inch piece of the brown felt. This is going to be used for attaching your tail once the tail is complete so, you can make this longer if you'd rather attach it to a belt rather than a safety pin like I did. Now you're going to fold the fabric in half to make it 1x1 inch. Then you're going the stitch the ends of felt together to make a flat loop. Next you're going to stitch the base of your loop onto the inside base of your brown fur (the flat end of the diamond), you can adjust how much of the felt you want sticking out.

Now you're to place the fur pieces on top of each other with the fur sides out. Starting to one side of the base of your tail you're going to align the fur and straight stitch your way around the tail. As you stitch your tail you're going to want to pull the thread a bit tight to make it gather since you want the pieces to bend and form a rounded pocket (since the two fur pieces are different sizes afterall). Once you've gone all around your tail you'll want to stop at the base and fill the tail with your cotton (I didn't have cotton so I used some fake Halloween cobbwebbs I had on hand), you may need to use your pen to help you pack it down into the tail. Once heavily filled, stitch the base of the tail closed.

Brush out your fur to tidy it up. Attach a safety pen to the felt end of your tail and you're ready to pin your tail onto your costume!

August 09, 2016

Hand Salve for Psoriasis - DIY

My mom has suffered from psoriasis on her hands for a long time now so, I decided to do a bit of research on some of the best ingredients to treat it with, and I created this tea tree smelling hand salve. As it turns out my mom use to do the same thing for her mom and herself a long time ago. While it did work my grandma she was not a fan of the tea tree smell, but my mom loves it stating "it smells like gasoline"! So I hope any psoriasis sufferers out there give this recipe of mine a try and let me know how it works out for you in the comment box below.
Hand Salve
1/3 Cup - Coconut Oil (solid variety)
1 Spoonful - Aloe Vera Gel (100%)
1 Spoonful - Lavender Massage Oil (or lavender oil)
1 Spoonful - Extra Virgin Olive Oil
1 Spoonful - Sweet Almond Oil
1 Spoonful - Tea Tree Oil

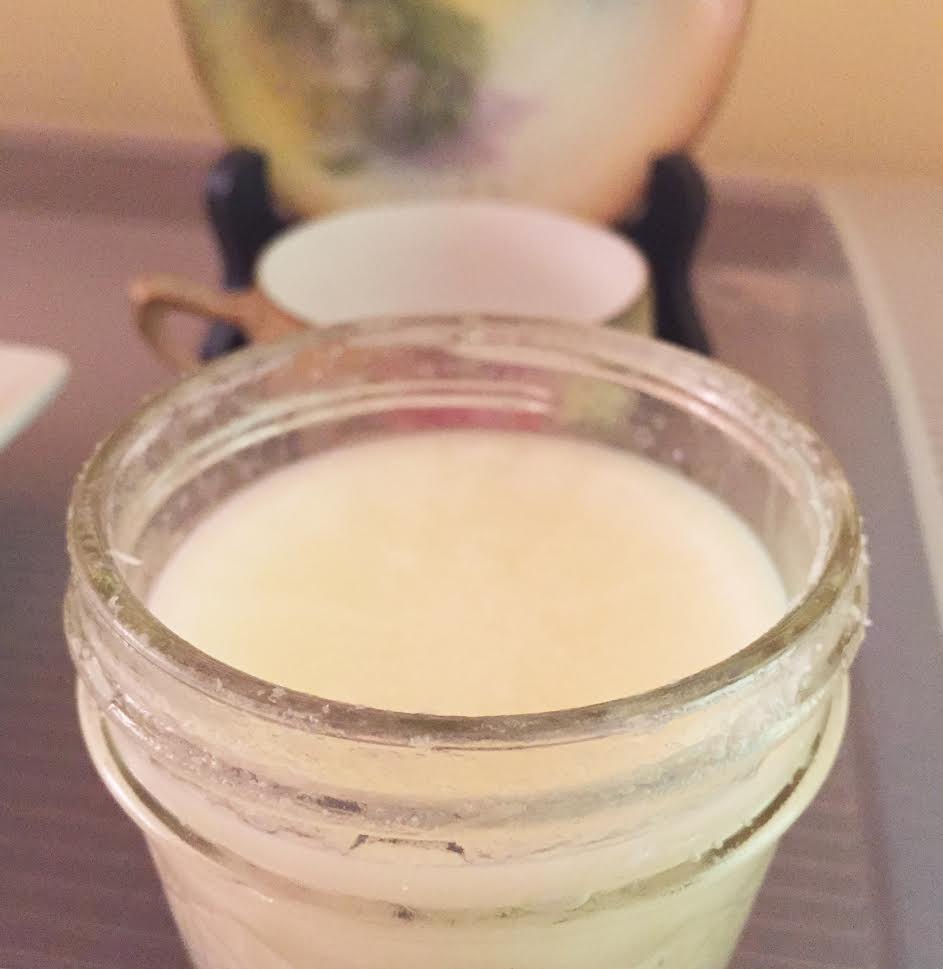
Place coconut oil into a glass jar (or similar). Melt the coconut oil 15-20 seconds in a microwave, or until it liquefies. Add in the other ingredients. Close the jar tightly with a lid and shake vigorously until ingredients are well combined. Loosen lid slightly and place in the fridge. Allow to cool in fridge until product solidifies. Your salve is now ready to use!

February 01, 2016

Vanilla Foot Moisturizer - DIY

Lately I have been trying to find ways to moisturize my feet since my toenails have seen better days. I found a few oils that have appeared to work great for things like dry toenails and feet so, I decided to create my own foot moisturizer. I apply this mixture to my feet at night before bed and I put on some thin cotton socks (cotton allows feet to still breathe) to help keep the moisturizer from rubbing off on my sheets and hold in the moisture. When I take off my socks in the morning my feet and nails look much more moisturized and have begun to heal more with each use. You can use this mixture regularly or as needed, and can adjust this recipe to your liking.

Did you know.. 
Oiling your feet can help improve mood and alleviate illness?


Ingredients
1 SMALL - Jar with Lid (or similar)
3/4 CUP - Coconut Oil (solid form)
1/2 TBSP - Sweet Almond Oil
1/2 TBSP - Jojoba Oil
1/2 TBSP - Imitation Vanilla Extract (or similar)

Melt the solid coconut oil in the jar (without lid) for about 30 seconds in microwave (once it starts melting you can remove from heat and stir until it dissolves completely). Combine the other ingredients into the jar, close lid, and shake vigorously until the mixture is well blended. Loosen the lid to the jar a bit and allow the mixture to cool in fridge for about an hour (or until the coconut oil becomes solid again). Remove from fridge, apply mixture to clean feet and toenails, and put on some thin cotton socks to help keep feet moisturized through the night.

You should not have to put the mixture back into the fridge again once it's a solid as it should remain a solid at room temperature. As the mixture warms in your hand it should turn to liquid/oil form making it easy to apply evenly onto your feet.

March 22, 2015

Organically Clean Makeup Brushes

To clean my makeup brushes without any harsh chemicals I use Dr. Bronner's unscented baby-mild pure liquid castile soap which basically consists of a combination of organic based oils. I pour some of the soap onto the brush while running the brush under the faucet and swirl the brush in circular motions against the palm of my hand (you can use a bowl if you prefer) and I repeat this process until the brush is clean of makeup residue. I then rinse the brush in a circular motion under warm/hot water, repeating until all the bristles on the brush is free of any soap. I then dry the brush in a circular motion on a clean dry towel until the bristles are mostly dry. Next I stuff a paper towel into the base of a drinking glass and store the clean brushes upside down in the glass. Then I leave the brushes to dry overnight so that any excess water gets drawn out of the ferule and onto the paper towel (if you have brush guards you can use those to help keep the form of the bristles while the brush dries). If the brush is still wet in the morning than blow some heat on it with a hairdryer for a minute or so, and avoid heating the ferule.

May 09, 2014

Kukui Oil + Coconut Oil

One product company I have a love-hate relationship with is Organix as I find several of the products to smell amazingly wonderful. On the downside I find that these products do nothing for my hair so, I really wish they would come out with some body spray or bath products. I recently got the Kukui Oil the other day and honestly I found it actually made my naturally curly hair frizzy rather than making it anti-frizzy as the products claims.
Believe it or not I did actually figure out how I could remedy this great smelling but otherwise useless product to work better for my hair, and that was to add in about a tablespoon of some unscented liquid coconut cooking oil. Coconut Oil is great to use to remedy frizzy hair and since the Kukui oil has no water in it, the liquid coconut oil mixed-in perfectly with this product and I actually think it helped make the Kukui scent last longer.

July 10, 2013

Watercolor Nails

This past week I created these cute and colorful watercolor-esque nails. Here's a LINK on how you can achieve this look. I of course added in my own personal touch with a hint of gold using a Stripe Rite nail art brush in gold glitter. I was originally hoping I had a chunky gold glitter polish to add to this nail look rather than the nail art brush, but I only had a silver one... I'll be on the lookout for one though (perhaps Milani in Gold)!
Base polish: Wet N Wild in French Creme White
Other polish colors used: China Glaze in Flip Flop Fantasy, Yellow Polka Dot Bikini, and Secret Peri-Winkle.

February 07, 2013

Nolita Nails - Tutorial

The other day I posted on my FB that next week consisted of 3 holidays... Chinese New Year, Mardi Gra, and Valentine's Day. So I asked everyone what type of nail design should I do and received several mash-up type ideas... but I honestly still wanted something a bit trendier rather than traditional. It wasn't until I came across a new clothing line coming out for Target on Chinese New Year that I found my holiday trio inspo. The new line is by Prabal Gurung and the theme happens to be about "love" so... there's my v-day part. The colors consist of mardi gra's infamous purple, yellow, and green shades (which the overall look does remind me just how festive mardi gra is!), and the Chinese part... well Mr. Gurung is Asian and of course its release date is on Chinese New Year so... I present these simple Nolita style nails.
Step 1: Apply a clear base coat (optional).
Step 2: Apply a base color in either yellow or white.
Step 3: Using several different colored nail art stripers haphazardly make 2-3 overlapping lines in each color going from the base to the tip of the nail.
Step 4: Apply a clear top. Let dry completely.

Side Note: If you don't have a bunch of nail art stripers or don't trust yourself with a nail art brush than try picking up a pack of BiC markers to draw on some lines instead, but I'd recommend using a white polish as a base color since the BiC markers are a bit transparent.

October 29, 2012

Simple Faux Corset

What you'll need...

Sewing Needle
Thread (to match your shirt)
6mm Ribbon
Shirt (you'll want a snug fitting shirt)
Chalk
Ruler
Hole Reinforcement Labels
Scissors
Lighter (with parental supervision)

Lay your shirt out flat with the side you'll be putting your corset on facing up. Using a ruler and chalk (our freehand a design) measure and mark where you'll be making your thread loops (you can also do a curved line or make parts of your design smaller and some wider as another possible option for a corset design). It doesn't matter how many loops you make vertically but you need a loop across from each loop made (keep in mind the longer the shirt/outfit the more loops you will probably have to make). I spaced my loops about an inch and a half above the other and about 4 inches horizontally from the other (you can space them however far apart you like, the shirt I used was an XXL size).
1. Place the labels where you want to create your loops at. Try on the shirt if you want to double check where you'll be making your loops at (better safe than sorry!). Next you'll want to pull some thread through your needle and knot both ends together.
2. Starting from the inside of your shirt you'll want to make 3 passes through the shirt going vertically.
3. Make 2 passes under those going horizontally to keep the loop in place, then tie off the loop inside the shirt and snip off the thread so you can repeat this step with the rest of the loops you need to make. Once the loops are done, remove your stickers and wash your shirt to remove the chalk. Next, use your ribbon to lace it through the loops you made, you'll lace it how you typically would with sneakers and then make a bow to finish it (you can either start lacing it from the top of the shirt or the bottom like I did with mine). Snip your ribbon when you have the length you want, carefully use a lighter at the ends of the snipped ribbon to keep the ribbon from fraying by melting it.

Easy Dresser-Top Makeover

This wood shelf unit was the top half to an outdated hutch which I painted with some semi gloss off white trim paint I had leftover. After having painted it I noticed the items sitting on top the shelf were hurting the dry paint and it still had a slight tackiness to it. So, I purchased this contact paper from Target (you could use any contact paper design of your choosing), cut the contact paper to fit the top, wiped off the dresser surface, peeled off the backing, stuck it in place and pushed out any air bubbles. This DIY project was really quick, easy, and cute :) Now I just want to redo the covered front area, but that's it for today!
Click to Enlarge

February 14, 2012

Simply Basic Ikat Nail Tutorial

Among being sick this week I was a bit lazy on doing my nails as I decided to reach into my purse and pull out the same red polish which I had used on my nails previously. So, without removing my polish I began to paint over my nails (hence the subtle two toned red appearance below) and create this adorable and pretty basic looking ikat nail design. I actually really love this look and I hope you enjoy it too :)
Click to Enlarge Image
Step 1: Base Coat: Nailtiques Formula 2 (1 coat).

Step 2: Second Coat: 10 Professional Nail Lacquer, in And The Winner Is... /427 (2 coats).

Step 3: Striped Ikat Design: It's So Easy Stripe Rite, in White (you're going to make a rough diamond shape on the nail by keeping the line strokes going vertically, ultimately the lines should touch together as you continue making the uneven lengthened lines, see my guidelines below for additional help).
Click to Enlarge
Step 4: Top Coat: OutTheDoor in Clear (1-2 coats).

September 24, 2011

Home Decor DIY's

The last week or so I've been doing some home DIY's which weren't too difficult to do but something to help pass the time.
I love chevron style decor!
I had this big generic looking wood framed cork-board in my closet which I had used to tack up my earrings before and I decided to give it a good 7hr makeover :P I used a big bottle of acrylic white paint and a small bottle of dark gray paint (yes, the cheap stuff works fine) which I got from Wal-Mart and Michael's. I made a 6 x 3 1in thick "L" shaped stencil and then traced out the pattern onto my cork-board once my 4 coats of white paint (big sponge brush used for that) had dried. Then I hand painted (2 different sized flat square paint brush's used) where I had traced my stencil lines and filled it in with the dark gray paint.
Quick and Easy Vanity Tray
I found this symmetrical black picture frame from TJMAXX the other day and decided to turn it into a small vanity tray. I removed the stand from the back of the frame and cut out a piece of scrapbook paper to put into the frame. I used a piece of cardboard to replace the stand I had removed, clipped it into place and it was finished, easy. You could even wrap or frame a thin piece of fabric over the glass frame as another option to do this project.

September 13, 2011

Butterfly Wing Nail Tutorial

I found this awesomely gorgeous butterfly wing mani while surfing the net and realized that this would actually be pretty simple to replicate. So, here's my tutorial...
I believe this might be China Glaze in Strawberry Fields.
Step 1: Paint your nails one vibrant solid color (or you could even using multiple colors), a few coats may be required to cover the nail, and let the polish dry completely (I did this a day in advance so my nails had time to dry and harden).
Step 2: Using a black Sharpie Marker (I find using a Sharpie is the easiest route) create the black wing outline (see image above for additional help) and allow to dry (tip: if you press on the black with your finger and it doesn't smear onto your finger then it's probably dry).
Step 3: Using a nail dotting tool or a toothpick dab on a few dots of white polish at the end of the nail and allow to dry.
Monarch Butterfly
Step 4: Apply a clear top coat, let dry completely and you're done!

June 30, 2011

Seven Oaks - TAG

I found this cute post on a friends FaceBook page which is basically creating your bands (or fake bands) album cover, it was fun (I made 2 quick ones so far, heh) so figured I'd share it on here today in case anyone else wanted to try it :)
http://www.flickr.com/photos/ddsnet/5876252353/
1 - Go to "wikipedia." Hit “random”
or click http://en.wikipedia.org/wiki/Special:Random
The first random wikipedia article you get is the name of your band.

2 - Go to "Random quotations"
or click http://www.quotationspage.com/ and click "random quotes" on the left side bar.
The last four or five words of the very last quote of the page is the title of your first album.

3 - Go to flickr and click on “explore the last seven days”
or click http://www.flickr.com/explore/interesting/7days
Third picture, no matter what it is, will be your album cover.
http://www.flickr.com/photos/gfwilliams/5876466168/
4 - Use photoshop or similar to put it all together.

June 23, 2011

Secret Obsession

For unknown reasons I really do enjoy giving old furniture a new life.
In the before picture (above) is a dresser that's similar style to what I grew up with as a kid (I always hated it!), its boring, dull, and this one was very worn (even missing a handle). This one I saw on eBay for $0.99, so I sketched it up on MS Paint and came up with a few new looks for it (I think the dark one came out pretty nice).
Above is another eBay find I found for $0.99 and I do like the original diagonal pattern on the two bottom drawers (although I'm going to change it all anyway). I like the retro feel of the pale celery shade one I came up with, I opted to change out the hardware on the first one and paint it in order to tone down its originally busy design.

June 19, 2011

Designing Polish

I had purchased some empty nail polish bottles a few weeks back online (about $1.13 per bottle with shipping) and decided I wanted to create my own polish shades using the ton of polishes I currently own. So, here are the colors I made and what polishes I used to make them.
-Pale Mint-
China Glaze: White on White
China Glaze: Paper Chasing
Essie: Turquoise and Caicos
Sally Hansen: Peachy Keen
OPI: What's with the Cattitude?
-------------------------------------
-Lilac-
China Glaze: White on White
10: Prima Ballerina
Milani: Cool Vibe
Essie: Looking for Love
Orly: Basket Case
-------------------------------------
-Barbie Pink-
China Glaze: White on White
China Glaze: Flip Flop Fantasy
China Glaze: B-Girlz
Orly: Basket Case
-------------------------------------
-Peach-
China Glaze: White on White
China Glaze: Flip Flop Fantasy
China Glaze: Style Wars
China Glaze: Breakin'
Wet N Wild: Ultra-Secret
Essie: Bright Tights
-------------------------------------
-Cheetah Gold-
China Glaze: White on White
China Glaze: Peach on Earth
Sally Hansen: Lightening
Loreal: Tres Soleil
Milani: Gold Lame
Milani: Morning Sunshine
-------------------------------------
I love how the colors turned out, my favorite is probably the Barbie Pink shade ;D I think I might deco the polish bottles later (ie. Sharpie Markers, Stickers, Glitter...or whatever). And yes...I did use up all my China Glaze "White on White" creating these X.X

July 27, 2010

Totoro Toy Tutorial

I wanted to do something a bit different for my tutorials and decided to create a magazine-style layout, so just click the image below to view this printer friendly DIY I created ;D