Showing posts with label Simple. Show all posts

March 29, 2013

Cinnamon Bisquick Muffins - Recipe

I started wondering if I could save some money today by using Bisquick and other ingredients I already have at home to make some cupcakes/muffins, and... I also really wanted to attempt making Skyrim's 'sweet-rolls', ahaha. So, I came up with this simple and tasty cinnamon cupcake/muffin recipe, enjoy!
1 ½ Cups - Bisquick
¾ Cup – Sugar, granulated
¾ Cup - Milk
2 Large – Eggs
1 Tsp – Vanilla Extract
¼ Cup – Vegetable Oil
1 Tbsp - Cinnamon, ground

1. Heat oven to 400°F.
2. Line a cupcake pan with paper baking cups. 
3. In a large bowl beat all ingredients with an electric mixer on medium speed for 4 minutes.
4. Evenly fill baking cups 1/3 full, cupcakes will rise while baking.
5. Bake 15 to 20 minutes, or until toothpick inserted in center comes out clean.
6. Remove cooked cupcakes from pan and let cool.

Makes: 14 Cupcakes

March 07, 2013

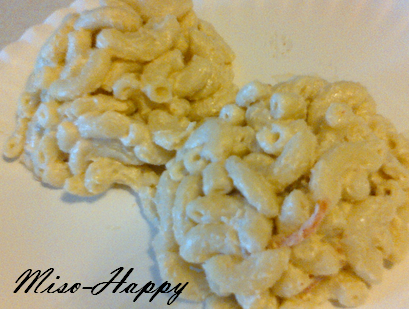
Hawaiian Macaroni Salad - Recipe

Having traveled around Hawaii before I've recently been trying to recreate L&L Hawaiian Barbecue macaroni salad. There are a million different ways people have tried to replicate this but they've all fallen flat in my opinion. That being said, this recipe I put together tastes the most similar to it in my opinion... so, until the actual recipe for it is ever divulged I hope you can at least enjoy mine in the mean time!
Ingredients
1 1/2 Cups - Elbow Noodles
1/2 Gallon (plus more for rinsing) - Water
1 Tbsp - Sea Salt (or 1/2 Tbsp - Table Salt)
1/2 Cup - Hellmann's Mayonnaise/Best Foods Mayonnaise
1/4 Cup - Carrots, pre-shredded matchsticks (chop slightly)
1/2 Tbsp - Morton's 'Seasoned Salt'
1 Tbsp - White Sugar
1 Tbsp - Half and Half (or Whole Milk)
2/3 Tbsp - McCormick's 'Molasses Bacon' seasoning *Optional*

Directions
Pour the water into a large pot and bring to a rapid boil on High-Med heat. Add the salt and noodles, bring water to a rapid boil again (be sure to stir noodles occasionally to prevent sticking). Rapid boil the noodles for around 25 minutes (or until fat and soft).
Noodles are almost done cooking
Drain noodles from the hot water and run under cold running water until noodles are cool, and drain well.
Sauce Mix
Combine the other ingredients in a bowl, stir until blended, and wait several minutes to allow the sugar to dissolve. Add in the noodles to the mix and stir together. Refrigerate for at least an hour or until the mac salad 'sets'. Stir the mac salad before serving.

Side Notes:
I believe I've mentioned before on this blog that all mayonnaise does not taste the same. If you live in Hawaii, their version of 'Hellmann's' mayonnaise is called 'Best Foods' mayonnaise although, I believe certain mainland states they also have it labeled as Best Foods mayonnaise.

With this recipe I made it's really easy to add in additional ingredients to alter this to your personal liking... such as some diced hard-boiled egg, sweet relish, etc. My personal favorite is to add in McCormick's grill mates in Molasses Bacon to the sauce mix (as you may have noticed in my above recipe), which makes for a great side dish to accompany some BBQ (although this is not in a typical Hawaiian mac salad... although I think it should be, haha). If you want your mac salad a bit more on the tangy side than cut down on the mayo a bit and add in some sour cream in its place.

The hardest part to making this dish is the noodles, it's very easy to have them be under-cooked for a mac salad as the cold water does seem to make them firm up and shrink a bit (most the time I cook my boxed noodles for 15 min, but that wasn't working for my mac salad so, you end up having to basically overcook the noodles).

If you're asking yourself "what's so Hawaiian about this dish?" well, to people in Hawaii there version of "Hawaiian" doesn't mean it has to consist of pineapple, Asian ingredients, fish, etc. Sometimes it's more about simplicity, cost, and how to feed the masses. Besides, you'd probably get burnt out on the stereotypical Hawaiian ingredients if you lived in Hawaii... or not? ALOHA!

January 28, 2013

Simple Ratatouille - Recipe

I just made this easy riff on ratatouille recipe that I found online the other day and I totally have to do a re-post of it on here (I did change a few things on my recipe here) because it's sooo vegan-rific (although I'm not vegan and most vegans would probably pass on the parmesan) and seriously smells like heaven in the making, haha. I'm definitely growing some fresh thyme this year!
Ingredients 
2 tbsp - Extra-virgin olive oil, plus more for drizzling
1 - White onion, thinly sliced
1 - Yellow summer squash, sliced 1/4-inch thick
1 medium - White potato, sliced 1/4-inch thick
2 medium - Tomatoes, sliced 1/4-inch thick
1 tbsp - Fresh thyme leaves
2 tbsp - Grated parmesan cheese, plus more for serving
Sea salt
Freshly ground pepper

Directions
1. Pre-Heat oven to 375°F. Heat oil over medium and cook onion in a pan until tender and lightly golden, 6 to 8 minutes.

2. Arrange the onion on the bottom of a 9-by-13-inch baking dish. Overlap tomato, squash, and potato on top of the onion. Drizzle with more olive oil, season with salt and pepper, sprinkle with thyme and parmesan.

3. Once oven is at 375°F bake covered for 30 minutes. Uncover and bake until golden, 30 minutes more. Sprinkle with a bit more parmesan and serve.

My Side Notes: I'd recommend when picking your sliced vegetables for this dish (not counting the onion) that you try to buy them all the same width around so that it fits better when you layer them inside the dish to bake.

November 21, 2012

Simple Pumpkin Pie - Recipe

This year my mom decided to buy Libby's "Easy Pumpkin Pie Mix" which is a bit different then what I was using previously but it doesn't require you to add in the sugar and it uses more pie mix than evaporated milk. It also says it contains spices, not sure what all that entails but below is the recipe I put together with this, enjoy :)

Ingredients
2 Cans (12 fl oz each) - Libby's Easy Pumpkin Pie Mix
1 1/4 Cup (10 fl oz) - Carnation Evaporated Milk
4 Large - Eggs, beaten
1 Tbsp - Vanilla Extract
1 Tbsp - Pumpkin Pie Spice (add more/less if desired)

Other
2 Frozen Traditional Size - Pre-Made Pie Crusts
1 Container - Whip Cream (Optional)
1 Box - Aluminum Foil

Using an electric mixer combine the pumpkin pie mix, evaporated milk and eggs in a large bowl. Cover the edges of the pie tins with the foil to protect the crust edges from burning. Pour the mix into the pie shells. Tap down the pies a bit to help release any possible air bubbles in the pie. Bake in a preheated 425F oven for 15 minutes. Reduce temperature to 350F; bake 50-60 minutes or until knife inserted near center comes out clean (because I had both pies in the oven at once I ended up having to cook them an additional 15-20 minutes). Cool on wire rack for 2 hours. Serve immediately or refrigerate.
----Additions----
I ended up further changing the ingredients a tad on both of my pies however, the ingredients above were in both pies from the start (although I used 4 'jumbo' sized eggs not 'large' ones this time). After I filled up one pie tin I added in some dots of Hershey chocolate syrup on top and ran a knife through the dots to create a marbled effect (I would've done bigger dots but I was low on syrup). Before I poured the batter into my 2nd pie I added in a 1/2 tbsp of ground cinnamon because apparently my mom felt we needed more in it this year (IDK why she waited this long to complain, lol) so, now we'll see which pie ranked supreme this year. I did have some batter leftover after making these 2 pies so, I'll figure out what to make with that another day ;) I do feel that using an electric mixer may be the secret to keeping the top of the pie from cracking while baking because it helps to mesh together the consistency of the pie mix without allowing the ingredients to separate really. Also, I feel like a lot of people probably don't use chocolate for a marbled pumpkin pie because the syrup is denser then the pie mix which can make the pie look more sunken-in at the chocolate parts... but that won't stop me from devouring the chocolaty monster, haha!

*Update* After having tried both the pies I made... overall they were both edible and ok, my cousin wanting to keep the pies all to himself too, hahah. Personally, I wasn't a fan of the Hershey Syrup I added into the one pie although my mom liked it best, and people felt their was a bit too much cinnamon in the other pie. So personally I'd prefer the original recipe and maybe 1/4 tbsp of ground cinnamon added to this 2-pie recipe to satisfy my mom :P Oh well, always next year to get it right!

October 29, 2012

Simple Faux Corset

What you'll need...

Sewing Needle
Thread (to match your shirt)
6mm Ribbon
Shirt (you'll want a snug fitting shirt)
Chalk
Ruler
Hole Reinforcement Labels
Scissors
Lighter (with parental supervision)

Lay your shirt out flat with the side you'll be putting your corset on facing up. Using a ruler and chalk (our freehand a design) measure and mark where you'll be making your thread loops (you can also do a curved line or make parts of your design smaller and some wider as another possible option for a corset design). It doesn't matter how many loops you make vertically but you need a loop across from each loop made (keep in mind the longer the shirt/outfit the more loops you will probably have to make). I spaced my loops about an inch and a half above the other and about 4 inches horizontally from the other (you can space them however far apart you like, the shirt I used was an XXL size).
1. Place the labels where you want to create your loops at. Try on the shirt if you want to double check where you'll be making your loops at (better safe than sorry!). Next you'll want to pull some thread through your needle and knot both ends together.
2. Starting from the inside of your shirt you'll want to make 3 passes through the shirt going vertically.
3. Make 2 passes under those going horizontally to keep the loop in place, then tie off the loop inside the shirt and snip off the thread so you can repeat this step with the rest of the loops you need to make. Once the loops are done, remove your stickers and wash your shirt to remove the chalk. Next, use your ribbon to lace it through the loops you made, you'll lace it how you typically would with sneakers and then make a bow to finish it (you can either start lacing it from the top of the shirt or the bottom like I did with mine). Snip your ribbon when you have the length you want, carefully use a lighter at the ends of the snipped ribbon to keep the ribbon from fraying by melting it.

September 22, 2012

Simple Healthy Pancake Recipe

Ingredients
1 whole - Banana, ripe
2 large - Eggs
Cooking Spray (or other)
1/4 tsp - Vanilla Extract *Optional*
1 dash - Ground Cinnamon  *Optional

How-to
Blend ingredients together in a blender. On a low-medium heat, use some non-stick cooking spray on a pre-heated griddle/pan (you'll want to spray the pan every time you make more pancakes to prevent sticking). Pour a small amount of batter (or whatever amount you want depending on what size you want your pancakes to be) onto a hot griddle/pan to cook. When the pancake looks mostly cooked flip it over until golden brown on both sides. Serve on a plate, maybe even drizzle some raw honey or syrup on top, eat and enjoy!